Creating a gallery wall in your living room is an excellent way to exhibit your most beloved photographs. It also showcases artwork and emotional artifacts. Additionally, it adds flair to the space. A gallery wall may transform a blank wall into a visually appealing focal point with proper planning and design. You may express your style and personalize your living space by learning how to create a gallery wall, whether you desire a minimalist design or a collection of various items.
This article will lead you through the steps of creating a gallery wall for your living space. These steps will help you create a display that reflects your personal style. They will also complement your living room design. This process includes selecting the artwork and arranging the pieces.
Why Choose a Gallery Wall?
Understanding why gallery walls are popular is crucial. You should know this before learning how to create one. To begin with, a gallery wall gives you the opportunity to cover a blank wall with inspiring art. It’s an adaptable and versatile design solution. It works well with any type of decor. This includes eclectic, modern, or antique styles. A gallery wall lets you tell a story. You can blend different elements, such as artwork, pictures, and memorabilia, into one cohesive and organized display.
Gallery walls are dynamic, above all. Over time, you may alter them by adding or removing components. This depends on how your tastes vary. It also depends on whether you gather new things. They’re a fantastic option for those who enjoy experimenting with their interior design because of their versatility. Let’s investigate how to build a gallery wall in your living room in light of this.
Step 1: Choose the Wall for Your Gallery
The first step in how to create a gallery wall is selecting the right wall for the display. Typically, gallery walls work well in living rooms because they offer ample space and are often the heart of the home. Consider these options:
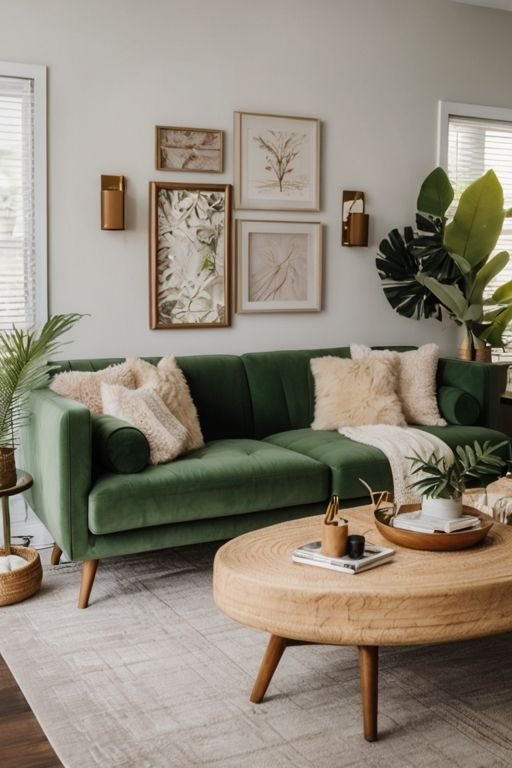
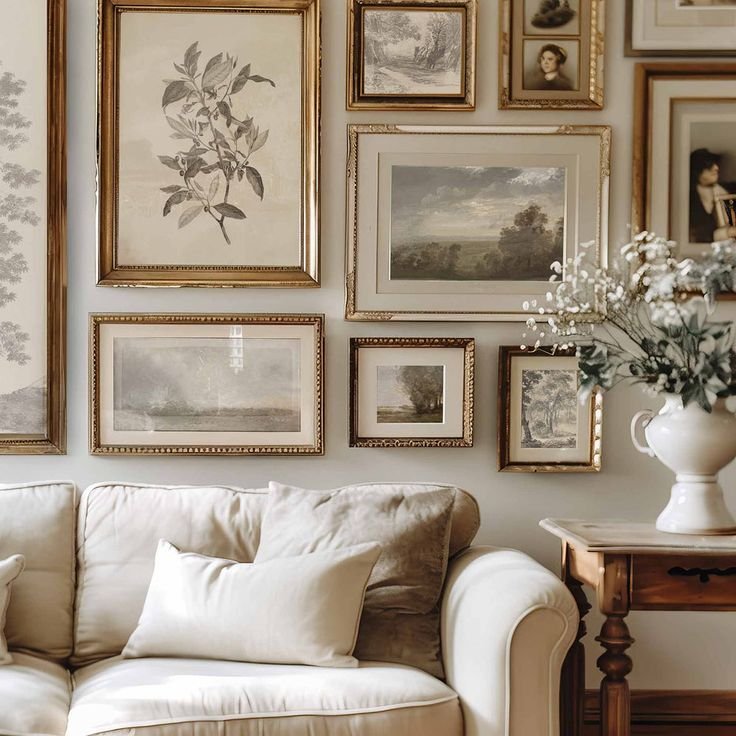
- Behind the Sofa: A large wall behind the sofa is a classic spot for a gallery wall. It’s an ideal location to create a central visual feature.
- Adjacent to a Window: If you have a narrow wall next to a window, you can use a gallery wall. It helps balance out the room’s proportions.
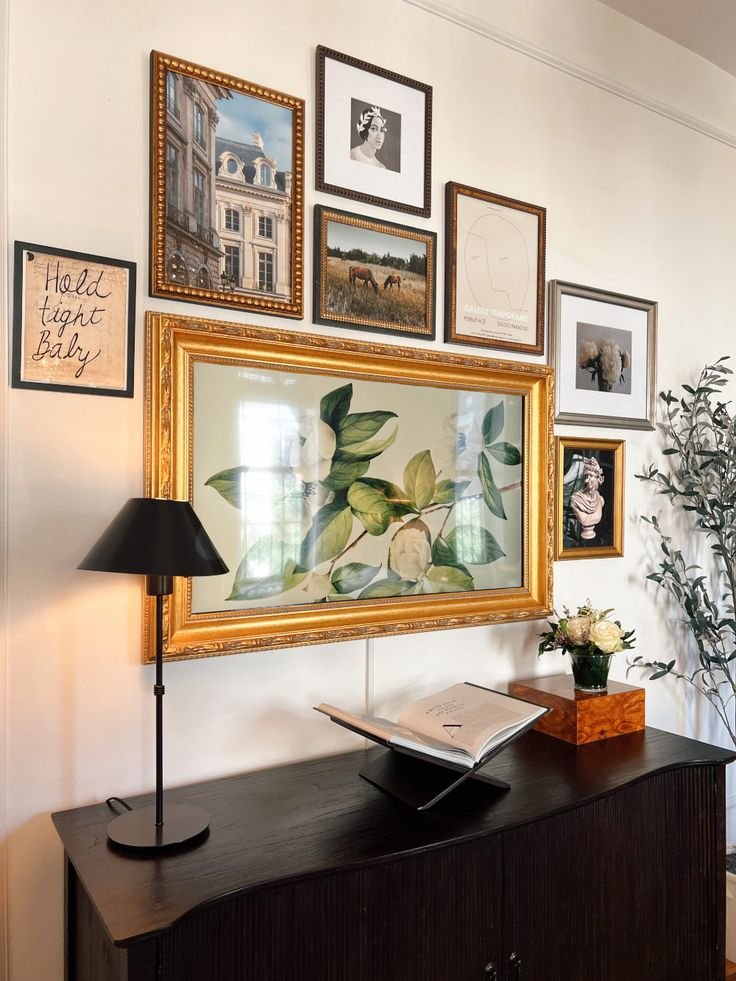
- Above a Console Table: A smaller gallery wall above a console or sideboard can act as a complement to the furniture without overwhelming the space.
- Entryway: The wall leading into the living room can make a bold statement and welcome guests with personalized artwork.
Once you’ve selected the wall, you can start planning your layout.
Step 2: Select Your Artwork and Pieces
Choosing the right pieces is a crucial part of how to create a gallery wall that reflects your style. A gallery wall can be a mix of:
- Framed Art: Choose prints, paintings, or illustrations that resonate with your style.
- Photographs: Personal photos add a sentimental touch to your gallery.
- Memorabilia: Items like postcards, souvenirs, or small sculptures can be framed or displayed in shadow boxes.
- Mirrors: Including a mirror or two can reflect light and make the living room feel more spacious.
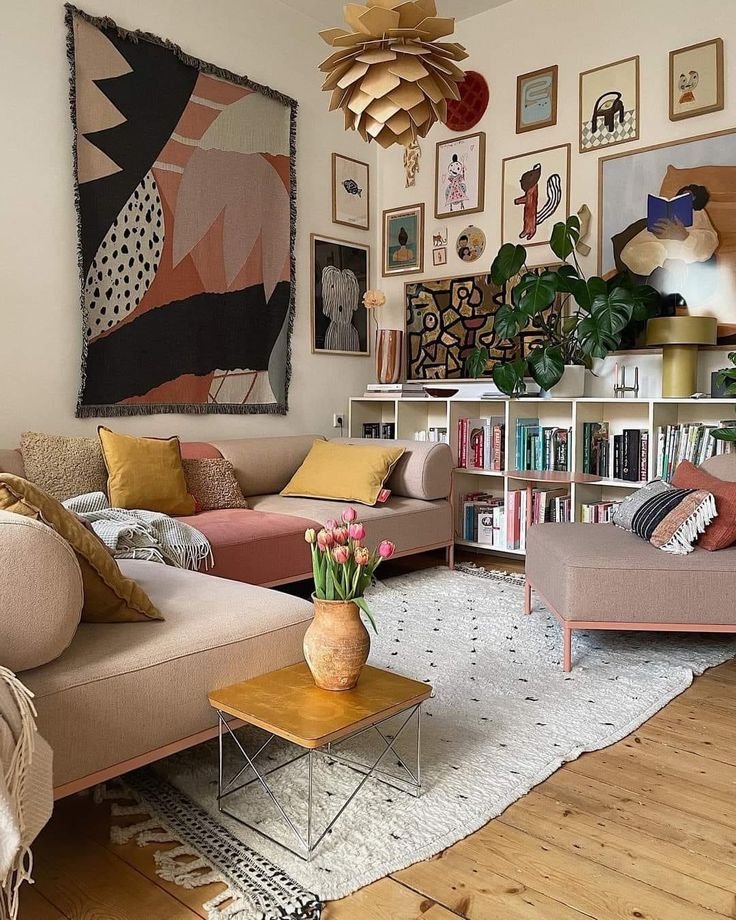
- Textiles: Don’t limit yourself to just flat pieces. Small woven textiles, like tapestries, can add texture and dimension.
When selecting pieces, consider creating a cohesive theme. This could be based on color, subject matter, or even frame style. A gallery wall doesn’t have to match perfectly, but having an underlying theme can help the overall design feel intentional.
Step 3: Decide on a Layout
Before you start hanging pieces, planning the layout is a critical step in how to create a gallery wall. Here are some layout options:
- Symmetrical Layout: For a more structured look, choose a symmetrical layout where the frames are aligned with equal spacing. This option works well for framed art of the same size and is ideal for creating a clean, modern aesthetic.
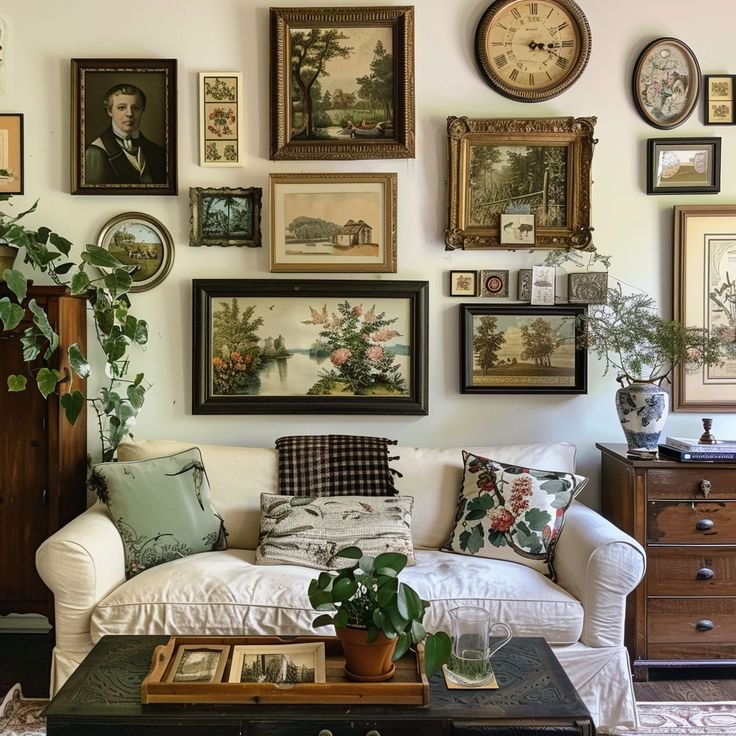
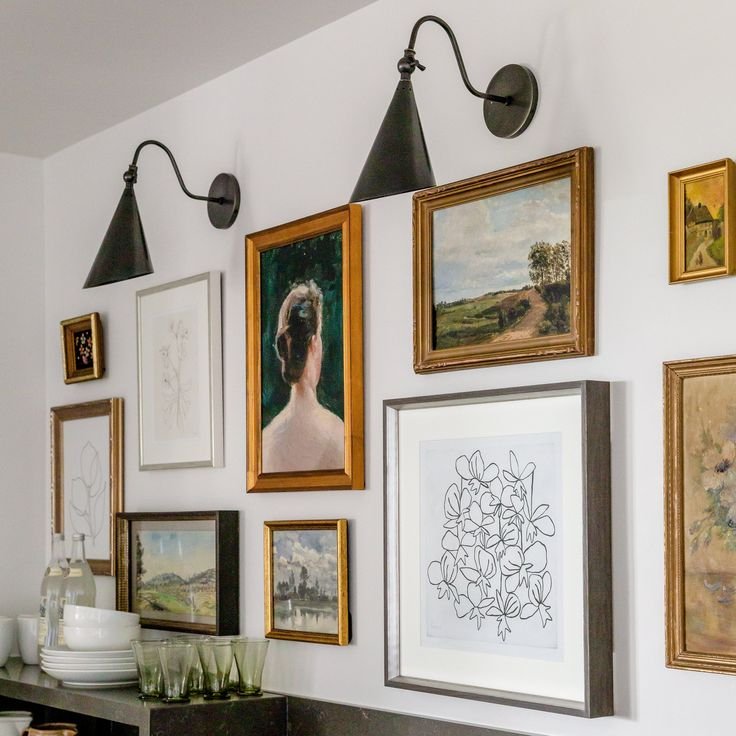
- Asymmetrical Layout: If you prefer a more relaxed or eclectic vibe, go for an asymmetrical layout. Combine different sizes and shapes, but make sure to balance the arrangement visually. This is perfect if you’re mixing various types of artwork, frames, and objects.
- Grid Layout: A grid layout is highly organized and works best when you have several similar-sized frames. It gives the wall a sense of order, perfect for minimalist or contemporary styles.
Step 4: Arrange and Measure
Before you start hammering nails into the wall, take the time to arrange your pieces. Here are two easy methods for testing your layout:
- Floor Layout: Lay all your framed pieces on the floor and arrange them as you’d like them to appear on the wall. This allows you to visualize the final look before committing.
- Paper Templates: Use kraft paper or newspaper to cut out templates of your frames. Tape these templates on the wall to simulate the final arrangement. This method is helpful for adjusting the spacing between frames and ensuring the design works with the scale of the room.
Make sure to measure the spacing between pieces carefully. A common rule of thumb is to leave 2-3 inches between each frame. However, if you’re going for a tighter or more clustered look, you can reduce the spacing for a more compact appearance.
Step 5: Choose the Right Frames
Frames play a significant role in how to create a gallery wall. The frames you choose can either complement the artwork or create contrast. Consider these options:
- Matching Frames: If you want a cohesive and minimalist look, choose frames that are all the same color and style. For example, all black or all wood frames can tie the pieces together, even if the art is varied.
- Mixed Frames: For an eclectic look, mix different types of frames. Combine metal, wood, and colorful frames to add visual interest. This approach works well if your artwork is varied in style, adding to the eclectic feel.
- Matting: Adding mats to your framed pieces can enhance the presentation and give each piece room to breathe. Mats are especially useful if you want to create uniformity between different-sized pieces.
Step 6: Start Hanging Your Gallery Wall
Now that you’ve planned your layout, selected your frames, and arranged your pieces, it’s time to start hanging. When hanging your gallery wall, it’s important to ensure that everything is level and secure. Here’s how to do it:
- Start with the Largest Piece: Begin by hanging the largest piece of artwork first. This will act as the anchor for your gallery wall, making it easier to place smaller pieces around it.
- Work from the Center Outward: First, make sure the central piece is in place. Then, work outward. Add pieces based on your pre-planned layout.
- Use Picture Hanging Hooks: To ensure that your pieces stay securely in place, use picture hanging hooks rather than nails. Hooks are designed to hold more weight and are less likely to damage your walls.
- Level and Adjust: As you hang each piece, use a level to make sure everything is straight. Don’t be afraid to make adjustments as you go along; it’s worth taking the time to get the arrangement right.
Step 7: Add Finishing Touches
Once your gallery wall is complete, consider adding a few finishing touches to enhance the overall effect. Here are some ideas:
- Lighting: Adding accent lighting can draw attention to your gallery wall and create a more dramatic effect. Picture lights or sconces can highlight individual pieces, while overhead track lighting can illuminate the entire display.
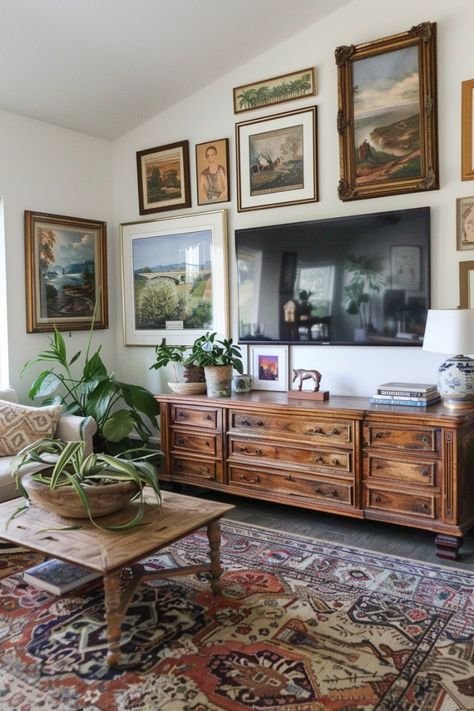
- Plants: Incorporating small plants or succulents near your gallery wall can bring in a natural element and soften the overall look.
- Decorative Objects: If you have a console table or shelf beneath your gallery wall, add a few decorative objects like vases, sculptures, or books to create a cohesive vignette.

Tips for Creating a Successful Gallery Wall
Now that you know how to create a gallery wall, here are a few additional tips to ensure your project is a success:
- Balance Color and Contrast: Pay attention to the color palette of your pieces. If most of your artwork is neutral, add a pop of color to break up the monotony. Conversely, if you have lots of colorful pieces, balance it with more neutral tones.
- Play with Scale: Don’t be afraid to mix large and small pieces together. A gallery wall with varying sizes adds depth and interest.
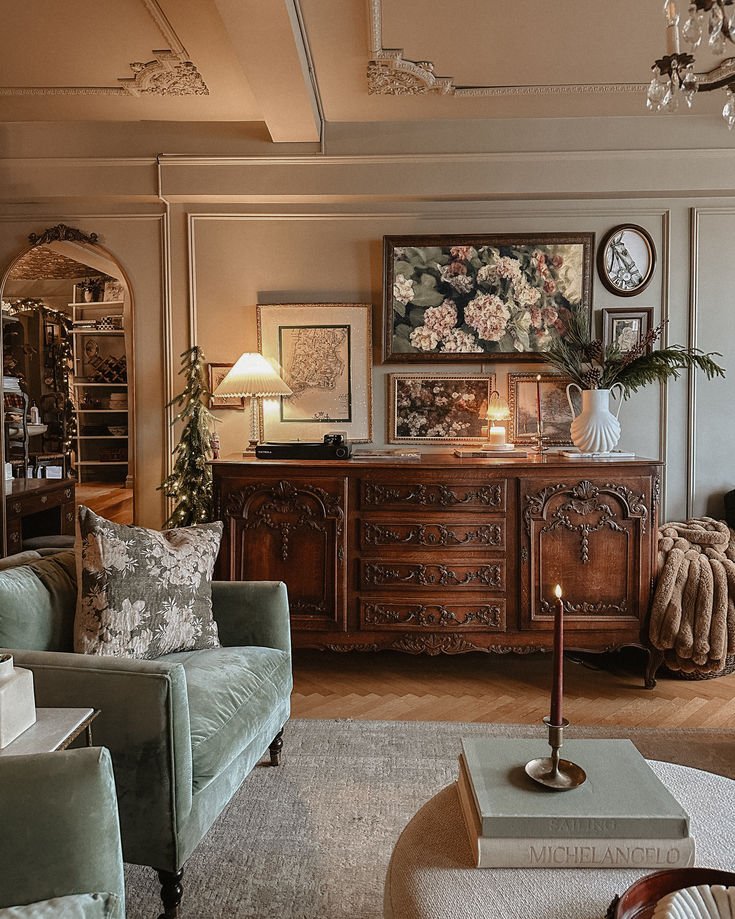
- Consider the Room’s Style: Make sure your gallery wall fits with the overall design of your living room. For example, if your living room is modern, opt for clean lines and minimal frames. For a more traditional space, choose ornate frames and vintage artwork.
- Keep It Personal: A gallery wall is a reflection of your personal style and memories. Include photos of loved ones, places you’ve visited, or meaningful objects to make the display uniquely yours.
- Evolve Over Time: Don’t be afraid to switch out pieces as your tastes change or as you acquire new artwork. A gallery wall is a living part of your home, and it should evolve with you.
Learning how to create a gallery wall in your living room can be a rewarding and creative process. From selecting the perfect wall to arranging your pieces, each step allows you to curate a display that tells your story and reflects your style. Whether you prefer a clean, minimalist layout or a vibrant, eclectic mix, a gallery wall can breathe new life into your living room.
By following these steps and incorporating your own personal touches, you’ll not only know how to create a gallery wall but also how to craft a space that’s both visually stunning and deeply meaningful. So, gather your favorite pieces, grab some picture hooks, and start creating the gallery wall of your dreams!